
It’s Day 3 of the Daylight Pouch Sew Along!
Today we only have one task. . . to sew on the zipper!
You can find the video that goes along with Day 3 at the links below:
Facebook
Instagram
A few tips for adding the zipper:
I use my standard presser foot when attaching zippers because it’s pretty thin and works well. Feel free to use a zipper foot or whatever works well for you!
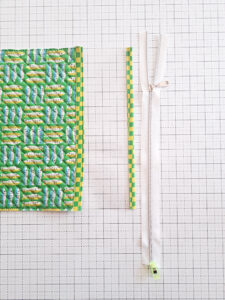
When you line up your zipper to sew it on, make sure to orient it as shown in the pattern (or in the photo above). You want to first sew the zipper to the vinyl side, with the zipper open at the top and most of the extra zipper length at the bottom. The extra zipper length at the bottom will help when attaching the second side of the zipper.
As you sew the zipper on, sew slowly and stay about 1/8″ away from the edge of the Vinyl Binding. Focus on sewing a straight line and keeping the zipper teeth the same distance away from the edge of the fabric binding the whole way down. As the presser foot gets close to the zipper pull, you can lower the needle, lift up the presser foot, slide the zipper pull past the presser foot so it’s out of the way, and continue sewing.
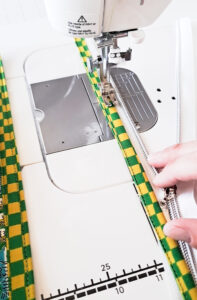
To attach the second side of the zipper tape, bring the far side of the Quilted Panel around to the zipper (keeping the Main side of the fabric facing outward) to make a tube. Line up the Bindings on both sides of the zipper and clip or pin the zipper tape to keep in in place.
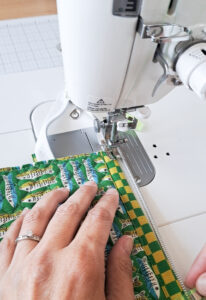
You’ll need to wrangle the rest of the pouch a little when attaching the second side of the zipper tape. This is where the extra length of the zipper comes in handy! Unzip the zipper as much as possible to allow for easy maneuvering.
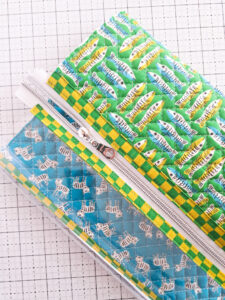
That’s it for Day 3!
I get asked all the time where I buy my zippers from, so I’m sharing a few links to some of my favorite places to purchase zippers below. I generally like to use larger size #4.5 or #5 zippers, as the zipper tape is wider and easier to work with. However, this pattern also works well with a standard size #3 zipper. I always use zippers with plastic teeth (instead of metal teeth) so I can sew right over them.
Zipper Recommendations
Link to the zipper by the yard I’m using for my Daylight Pouch in these photos. These zippers look metal (gold, rose gold, gunmetal, etc.) but are nylon (plastic teeth). Click HERE
ZipIt Etsy shop (they have such a good variety of YKK zippers, both size #3 and larger size #4.5 or #5 zippers). Click HERE
By Annie Zippers by the yard (size #4.5): click HERE
Sallie Tomato Zippers by the yard (both size #3 and #5): click HERE
Zipper Valley in Canada: click HERE
Thanks for sewing along!
Kristina