It’s Day 3 of the Good Luck Pouch Sew Along!
Today, we are preparing our bindings and handle, sewing on the Zipper Bindings, and attaching the zipper.
Just a few random notes on today’s assignment:
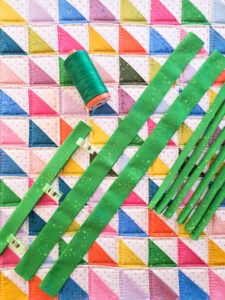
When you cut out the Side and Boxy Corner Bindings, you can cut one long length of the fabric, press it all as instructed in the pattern, and then cut the long strip into the correct lengths for the Side and Boxy Corner Bindings. I usually forget to do this (haha!), but have found that sometimes it’s easier to press a long strip, then cut into smaller pieces, instead of pressing all the smaller pieces of fabric.
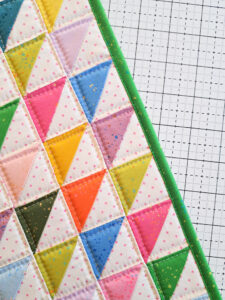
Follow the instructions in the pattern to attach the Zipper Bindings onto the quilted panel, making sure to sew to the lining side first! Then pull it taught before stitching onto the Main fabric side. I like to sew right along the folded edge of the binding. I really try to focus on getting a nice, straight line since this top-stitching will be very visible. Sewing slowly with a matching thread color can really help that line of stitching look nice.
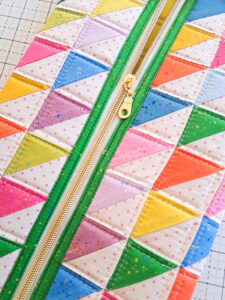
When you line up your zipper to sew it on, make sure to orient it as shown in the pattern. You want the zipper to be open at the top and most of the extra zipper length at the bottom. This will help when attaching the second side of the zipper.
As you sew the zipper on, sew slowly and stay about 1/8″ away from the edge of the Zipper Binding, Again, focus on slowly sewing sewing a straight line while keeping the zipper teeth at the same distance away from the Zipper Binding the whole way down. As the presser foot gets close to the zipper pull, you can lower the needle, lift up the presser foot, slide the zipper pull past the presser foot so it’s out of the way, and continue sewing.
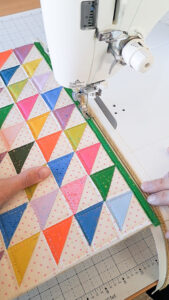
I use my standard presser foot when attaching the zipper because it’s pretty thin and works well. Feel free to use a zipper foot or whatever works for you!
When sewing on the second side of the zipper, you’ll need to wrangle the quilted panel a little to get it out of the way of the sewing machine needle. This is where the extra zipper length comes in! Unzip the zipper as much as possible to allow for easier maneuvering.
Those are my tips for Day 3! You can find the Day 3 Sew Along video on my Instagram account HERE.
Links to items from today’s tips:
Clover Wonder Clips
Oliso Mini Iron
Pellon SF 101 Lightweight Fusible Interfacing
White and gold zipper by the yard I’m using in these photos
Thanks for sewing along!
Kristina