Welcome to Day 3 of the Atlas Zipper Case Sew Along!
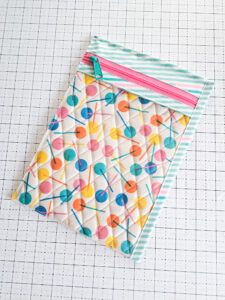
Today, we are assembling the Tall Vinyl Pocket. This pocket has one large vinyl zipper pocket and will go on the left side of our zipper case (when it’s laying open).

Most of today’s assignment is centered around vinyl, so here are a few things to note about working with vinyl:
- When vinyl is sewn through, the sewing machine needle makes a hole in it. Unlike sewing through cotton fabric, the puncture made in vinyl is permanent and easily visible if the thread needs to be taken out of the seam. For this reason, I always sew extra slow when sewing with vinyl so as to minimize the chance of having to redo any seams. In most instances for the Atlas Zipper Case, if you sew one of the bindings on the vinyl and make a mistake, you can likely seam rip the thread out, then cover the existing holes in the vinyl with the binding fabric.
- For holding vinyl pieces in place, I frequently use Wonder Clips, but never pins. As I’m sure you have guessed by now, the pins will put a permanent hole in the vinyl.
- I always use my regular Organ brand 90/14 needles when sewing vinyl. I would guess that sewing through vinyl would make the needle get dull faster, but Organ brand needles are really inexpensive (link HERE), so they are still economical if you’re changing them regularly.
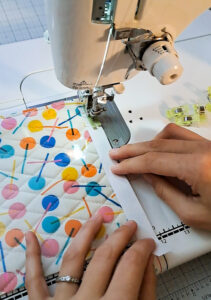
- Vinyl has a tendency to cling to certain surfaces, including your presser foot and needle plate. If you’re sewing on vinyl that’s facing up, you’ll want to make accommodations so the vinyl doesn’t stick to the presser foot. I use either a non-stick presser foot (I’ve linked the one that works with my Juki at the bottom of the post), or small strips of thin paper in between the vinyl and presser foot. The paper will keep the vinyl from sticking to the presser foot and you can sew right through it then gently tear the paper away after finishing the seam. I used the paper strips method for years before finally purchasing a non-stick presser foot. In the photo below, you can see the thin strip of paper in between the presser foot and vinyl. It’s such an easy method and works great!

- If you’re sewing with the vinyl face down against the needle plate and machine bed, there are products that are made to make your machine bed more slippery so the vinyl doesn’t stick to the sewing machine. I haven’t used any of these products, so I can’t speak to their effectiveness, but did want to mention them in case anyone wants to check them out (I’ve heard of both a spray and a slippery mat that lays on top of the machine bed). Instead, I prefer to gently pull on the side of the vinyl that’s made it through the needle to help the piece travel under the needle without sticking too much to the needle plate. It might also help to check your presser foot pressure. If your presser foot is pushing down really hard against your vinyl/fabric, then the vinyl will be more likely to stick as it goes through the needle.
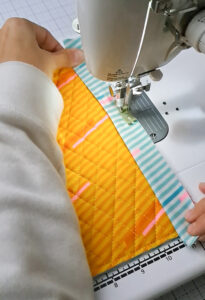
- In the photo below, I am attaching the Binding to the side of the Tall Vinyl Pocket Panel. The piece of vinyl is face down against the needle plate, and it was sticking slightly to the machine bed. You can see my left hand gently pulling the piece through the needle, helping out those feed dogs push the vinyl through. I’m also lifting the panel up a bit to try to keep the vinyl off of the machine bed as much as possible. You can also use the paper trick here, too! Put a piece of paper under as much of the vinyl as you want, and the vinyl won’t have a chance to stick to the bed.

- When adding binding and the zipper to the vinyl, I’ve purposefully made the pieces a little larger than the Quilted Accent piece that the vinyl will be sewn to. Making it oversized uses only slightly more material, but results in a much nicer finished product. It’s hard to get all those bindings to line up perfectly with the zipper and vinyl without having any wiggle-room! So starting off larger and then trimming to size is my preferred method when dealing with many different pieces.
Those are my tips for Day 3! You can find the video that goes along with today’s assignment on my Instagram account HERE.
Links for products from today’s tips:
Non-Stick Presser Foot that fits Juki TL2000 and TL2010 machines–it’s under $5! (click HERE)
Juki TL2000 Sewing Machine (click HERE)
Organ 90/14 needles (click HERE)
Thanks for sewing along with me!
Kristina

Kris says:
This is such fun! That zipper with blue pull ❣️❣️❣️