It’s Day 2 of the Pascal Carrying Case Sew Along and today we are prepping the Accent fabric Binding pieces and Strap. Today’s assignment is pretty easy, so it’s a good time to catch up on Day 1 if you didn’t get the quilting done yesterday.
You can find the Day 2 video that goes along with today’s assignment on Instagram HERE or Facebook HERE.
The Binding is pretty self-explanatory, but I did want to mention a couple things.
If you’d like a greater variety of fabrics, feel free to use different fabric prints for the Binding and Strap Cover pieces. You definitely don’t need to stick to just three fabrics (Main, Lining, and Accent) that are listed in the pattern.
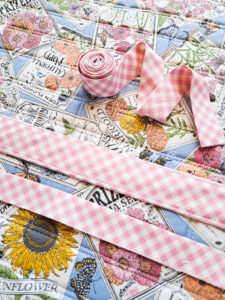
For the Medium and Large Pascal bags, you’ll need to join your two Final Binding strips together before pressing (the Small Pascal bag only needs one 42″ long binding strip for the Final Binding). I like to join my strips on the diagonal (see photo below). Sewing them together at a 45° angle helps distribute the bulk of the seam so it’s not all in one place on the binding. Note: the tape on the bed of machine (extending out from the needle plate) is super useful for sewing diagonal seams. You can see that the bottom point of the top binding strip is lined up with the red line on the tape. This helps you sew a 45° angle without having to mark the line on the fabric. The tape is from Cluck Cluck Sew and is called Diagonal Seam Tape. You can find it at many different quilt shops or on Amazon HERE.

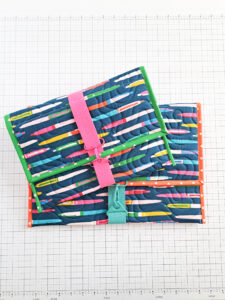
A fun option for the Strap is to use a coordinating decorative webbing–-just cut the webbing to the size given and you can skip cutting out and sewing the Strap fabric. The straps below aren’t over-the-top exciting, but they are fun colors! They are cotton webbings from Stitch Supply Co and since they matched with the fabric perfectly, I didn’t need to cover the straps. Yay!
If you’re covering the webbing, you’ll make the Strap Cover as the pattern instructs. Make sure to press the seam open before turning it right side out. This helps the seam lay flat once you have the webbing inside.
A tube turner tool (shown in the photos below) or safety pin works well for turning the fabric right side out.

When inserting the webbing into the fabric, you might be able to just insert and push it into the fabric Strap Cover. If you have issues getting the webbing all the way in, you can use a safety pin on one end of the webbing, then wriggle the safety pin through to the other side.
That’s it for tips today! You can find the Day 2 video that goes along with today’s assignment on Instagram HERE or Facebook HERE.
Links for products from today’s assignment:
Tube Turner (shown in my video for turning the Strap right side out)
Clover Wonder Clips
Organ 90/14 needles
Bulk poly webbing in 1″ and 1.5″ options (I like to have these on hand to cover with fabric)
Cluck Cluck Sew Diagonal Seam Tape
Cotton webbing from Stitch Supply Co
Thanks for sewing along!
-Kristina