This is a sponsored conversation written by me on behalf of Cricut. The opinions and text are all mine.

When I received my Cricut Explore Air 2, one of the things I was most excited about trying was vinyl! I’ve made projects with vinyl, but have never cut my own vinyl (I’ve always used pre-cut vinyl) and have never used iron-on vinyl either.
To get started, I found a mini-sampler pack of Cricut Everyday Iron-on Vinyl with colors that worked for the project I wanted to do. The sampler packs are great because they come with several different colors, are pretty inexpensive, and since if you’ve never tried iron-on (like me) and are unsure if you’ll like it, you’re not committing to a large amount of vinyl.

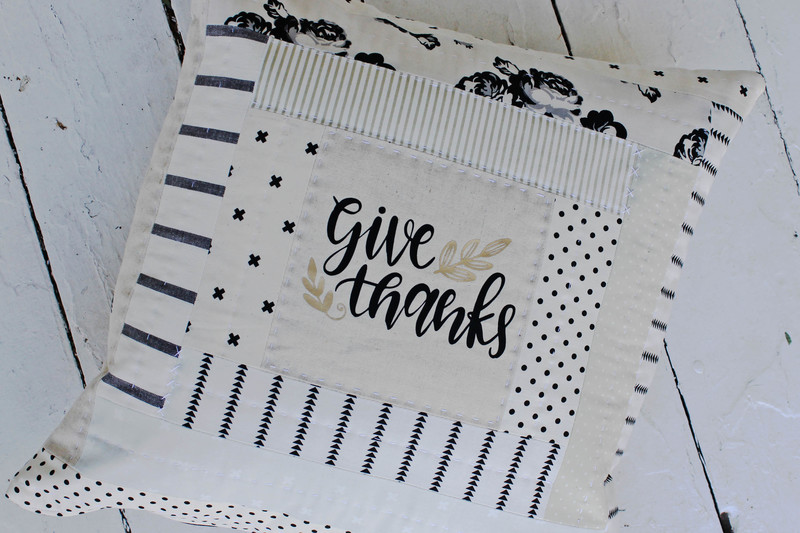
Since I wanted to make a Thanksgiving project, I got onto Cricut Design Space and found a perfect “Give Thanks” image to use (the project file is called “Give Thanks Placemat” in Design Space if you want to find it there). As I got ready to cut, I chose Everyday Iron-on Vinyl as the material and Design Space put up a warning reminding me to switch the format so I was cutting the file as a mirror image. I was so grateful for my smart Cricut in warning me about that! I didn’t even realize that you had to cut it reverse image, so that saved me some headache for sure.

After removing the excess vinyl, I was left with the Give Thanks phrase on top of the sticky liner. I positioned the vinyl on top of the piece of linen and was ready to iron!

The EasyPress 2 was super easy to use for adhering the Give Thanks onto the linen. You just set the temperature to the right number (there’s a handy Heat Guide here to help with temperature and time settings) and let the EasyPress 2 do all the work!

After the alotted time has passed, you can slowly remove the liner and the vinyl is left ironed onto the material! Wahoo! In full disclosure, there were a few spots of the “Give Thanks” letters that didn’t get ironed on too well at first—they wanted to stick to the liner instead of the linen. I originally didn’t have the temperature up quite high enough, so I increased the temp, ironed the phrase again, and the second time it worked much better.

I repeated the process with gold iron-on vinyl for the leaves and the leaves worked perfectly (after remembering to cut them out as mirror image, of course!) 😉 They were easily ironed onto the linen and the liner came off nice and clean.

To finish off this fun little Thanksgiving project, I trimmed the Give Thanks linen panel to 6-1/2″ square then added a few borders of 2-1/2″ strips around the outside. After a little hand quilting and installing a zipper, I had a new pillow to display!
I love my new pillow and the cute iron-on vinyl in the middle really adds a special touch. The whole process was surprisingly easy and I’m looking forward to many more iron-on projects in the near future! If you have been wanting to try out vinyl and haveany questions about the process, please let me know–I’d be happy to help.
Happy sewing!