This is a sponsored conversation written by me on behalf of Cricut. The opinions and text are all mine.
Almost exactly ten years ago, I purchased a Cricut Expression on Black Friday. I used it for a couple years to add some flair to my scrapbook pages and birthday invitations. I loved having it for my paper crafts, but as I did scrapbooking less and less, I decided to pass it on to someone else who would use it more. In the years since I’ve given it away, I’ve often thought it would be fun to have a computerized cutting machine again–and especially to try out the more specialized functions like cutting vinyl, iron-on vinyl, window cling, faux leather, and the new infusible ink. Can’t you just imagine all the cool craft projects you could create with the ability to intricately cut those types of materials?!?
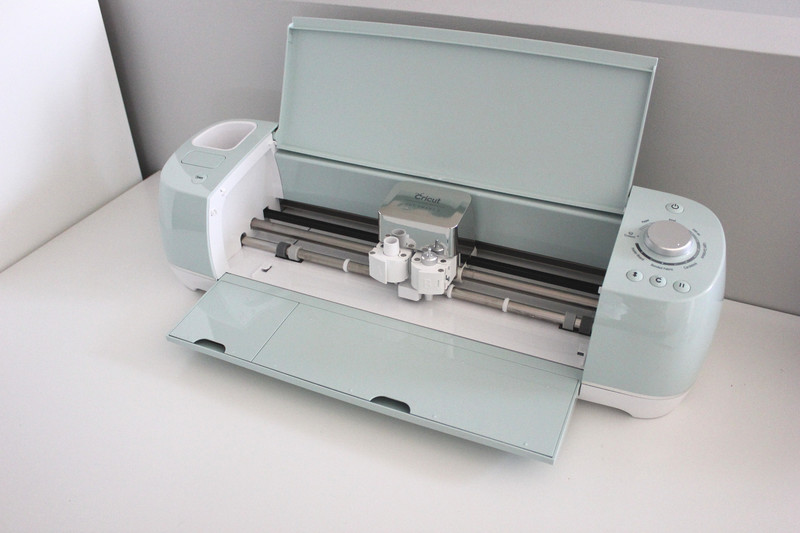
I figured over the course of ten years, things could change a whole lot in the realm of electronic cutting machines, and I was eager to try out the new Cricut Explore Air 2. Upon receiving my machine, the first thing I noticed was the color (I mean, I’m a quilter, so I’m allowed to be impressed by the color, right?). There are several color options and I got the gorgeous mint version–so pretty! There are also some handy storage compartments built into the machine to hold tools.

I wanted to immediately get cutting, so I turned to the Cricut Design Space to find a fun design. Just a warning: the Design Space has SO MANY fun designs. My list of items I wanted to make suddenly grew by about twenty. Haha. I ended up finding a fun bat design that would make some fast and fun Halloween decorations (the design I chose is called “Fancy Paper Pumpkins” if you want to find it on Design Space).
The Cricut Explore Air 2 easily connected to my laptop–I just plugged the Cricut cord into the USB port on my laptop and followed the instructions to pair them. I found out later that the Explore Air 2 has bluetooth capability, so you can bet that will be something I’m going to be trying out next! It will be so nice to just send the cutting files to the Cricut without having to connect them by a cord!
I only had 8.5″ x 11″ pieces of black cardstock, so I chose that option on the Design Space “Material Size” drop down menu and the bats from my chosen design automatically adjusted to fit onto an 8.5″ x 11″ piece of paper. For me, that feature is particularly impressive because with my old Cricut, I’d have to manually arrange the figures on the screen to make sure they fit within the size parameters of the cardstock I was using. With the Cricut Design Space, you can also easily adjust the number of figures to cut (copy and paste more figures, or delete to have less) and the size of the designs.
Cutting out the bat figures was a lot faster and smoother than with my old Cricut, too. I could tell the Explore Air 2 had a lot more power and it seemed to effortlessly cut the cardstock. The cut bat pieces were easy enough to remove from the mat, but I would suggest cutting everything you need from the cardstock/paper on the first run, as the left over cardstock ripped a little here and there taking it off of the adhesive mat.
The bat figures that I cut out had scored lines for their wings to help with bending in the right place. I haven’t purchased a scoring tool for my Cricut yet (it’s on my wish list, though), so instead of having the Cricut cut out the scored lines, I just used a ruler with a metal edge to bend the wings in the direction I wanted. Easy, peasy!
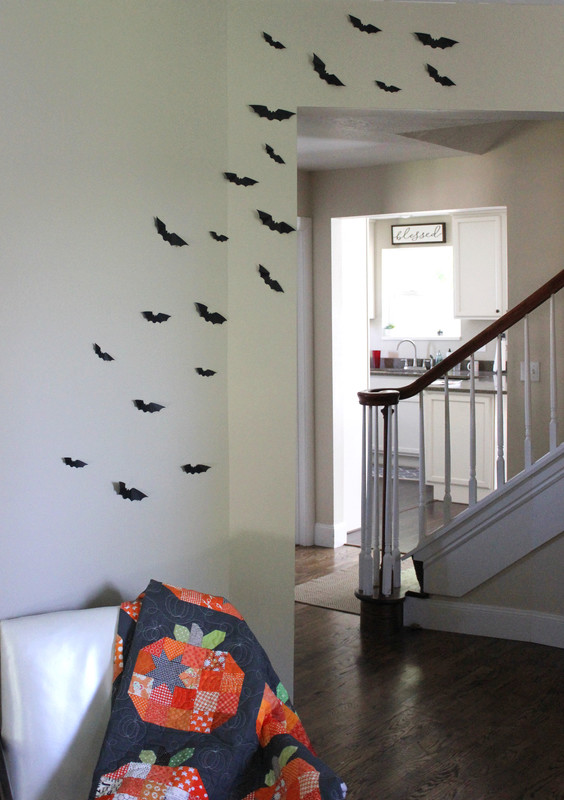
My kids helped me place the bats on our wall and they thought it was so fun to have a colony of bats invading our living room. And I thought it was so fun that the project took less than thirty minutes total!
Overall, I am super impressed with my Cricut Explore Air 2. This little bat project was a perfect starting off point and I’m more excited than ever to see what else it can do.