So you have a foundation paper pieced (FPP) pattern that you love, but it’s just not the right size for your project? Never fear–I’m going to give you all the info on how to adjust the size (shrink OR enlarge) your foundation paper pieced patterns so you can customize it to fit whatever project you’re working on!
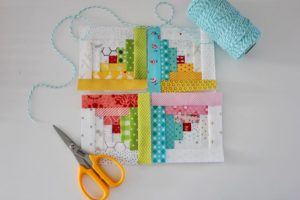
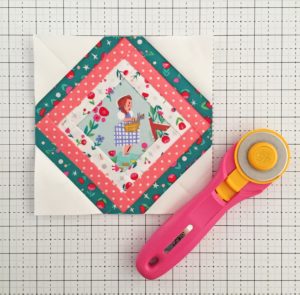
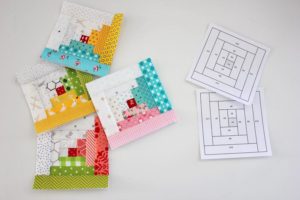
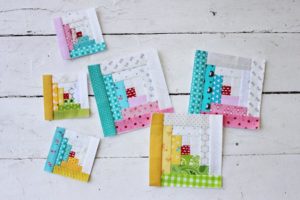
Below, you can see my Tiny Log Cabin FPP block. The pattern comes with many size options (2″, 3″, 4″, 5″. and 6″) but what if you needed a different size? For example, if the project you were working on needed the Log Cabin block to be 7″ x 7″, you’ll need to enlarge the size of the pattern with a copier (or printer settings) to fit your needs.
To change the size of a foundation paper piecing pattern, you’ll want to choose the Resize option on the copier and then you can change the enlargement or reduction value to what you need. 100% will be the original/starting size of your pattern. If you want to shrink it, you’ll choose a number below 100%, and if you are enlarging the pattern, you’ll choose a number above 100%.
For a simple enlargement, such as making a pattern 2 times the original size, the calculation is easy: 2x the original size is 2 x 100% = 200%. Or for half of the original size, the calculation would be: 1/2 x 100% = 50%.
What if you’re wanting to do an enlargement or reduction that isn’t straight forward, though? If that’s the case, here’s the formula for you to use:
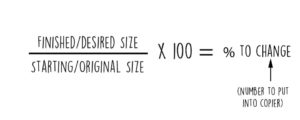
The finished/desired size is the size you want the pattern to end up being. The starting/original size is the size that the pattern started out as (these sizes are without the seam allowance!). Again, if you are wanting to enlarge the pattern, the “% to change” number should be larger than 100. If you are wanting to reduce the pattern, the “% to change” number should be less than 100.
If the percentage ends up being a number with a lot of decimals (e.g. 33.3333%), just round up to the nearest whole number (33.3333% —> 34%). That will make the pattern be just slightly larger (which is much easier to work with than pieces that are too small!).
After figuring out the correct enlargement or reduction size, you can go ahead and make the copies! I would suggest checking the pattern size with a ruler to make sure it is in fact the size that you were aiming for (check the size of the block without the seam allowances).
After you have your copies, you’ll notice that the seam allowances are not an exact 1/4″ anymore. If you enlarged the pattern, the seam allowance will also be enlarged and you’ll need to draw a new line 1/4″ away from the edge of the pattern to bring it back to the correct size. If you reduced the pattern, the seam allowance will be smaller. You’ll need to adjust it so it’s up to 1/4″ in size.
Sometimes the original pattern pieces are really close together and after you reduce the pattern, there isn’t 1/4″ in between the pattern pieces to make the seam allowances correct. If that’s the case, you can either print out multiple copies of the pattern to make sure you get each piece cut correctly with the accurate 1/4″, or you can keep the pattern pieces as is with a smaller seam allowance and after assembling each piece, remember to trim the fabric to 1/4″ (which will be beyond the edge of the paper).
I hope that helps clear up any questions you might have on enlarging or reducing a paper pieced pattern! Please let me know in the comments if you need any clarifications or have any additional questions for me. Thanks and happy sewing!